TengYoShiro | WIP


Type:
Personal Project
Responsibilities
-
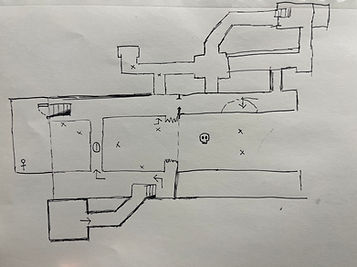
Designed the layouts of the entire map.
-
Modeled al the buidlings in UE5
-
Extended level's functionality by adding elevators, lockers, ladders, doors
-
Refined player battle experience
Video Link
Software Used
UE5, Blueprints, Photoshop, Perforce, Miro
Inspiration
Dark Souls 1 : Undead Parish Level
Dark Souls 3: Anor Londo Level
EldenRing DLC: Shadowkeep Level
Bloodborne: Central Yharnam
_______________________
In this project, my main goal was to create an Elden Ring-style level—one that is highly interconnected and has multiple layers and hiding spaces for the player to explore. The challenge was to design different types of shortcuts while keeping the overall map layout interesting.
Gameplay
OverView
After completing two level breakdowns for Elden Ring, I set a new goal that I have wanted to start this project for years: to create a level for Dark Souls 1 using Elden Ring -style level design.

Narrative
On a mountain sits a prosperous town, sustained by a magical river that grants eternal youth and health. For generations, the town thrived, sharing the river’s bounty with those living in the valley below. But one day, the nobles sealed the gates, blocking the river's flow.
Without its life-giving waters, the valley plunged into famine and disease. Desperate, the people pleaded for the gates to reopen, but their cries were ignored. Anyone who tried to climb the mountain was killed. Now, with the valley has become a ghost town...
Design Process
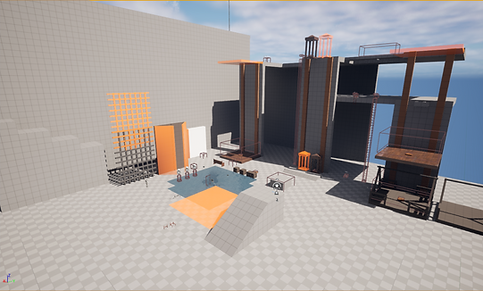
The main inspiration is Kiyomizu Dera, so the main reference that I chose is traditional japanese house. Instead of finding reference, I go straight into the engine and start whiteboxing to determine what kind of experience and element I want to use in this level.
Early prototypes


After early testing, several elements were confirmed for inclusion in this level:
-
Three bridges: Large, medium, and small—all parallel and visible from above.
-
A big dam: Players can break it to release water, affecting the map.
-
Three distinct layers: Ground level, mid-level (sewers, cliffs), and the riverbed.
-
A central building
-
A boatyard
-
A Kiyomizu-Dera-style upper area
-
Just like in Dark Souls 1, players are not allowed to fast travel between bonfires early in the game.
Research
After I determine what kind of element i want to keep in this level, I start doing research about japanese style of building

Blueprint
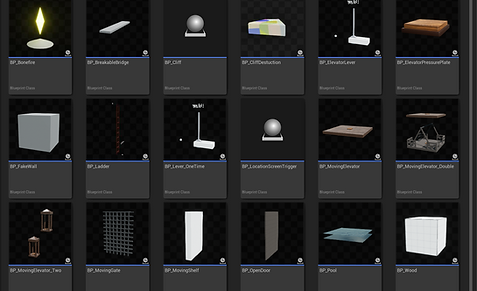
The best part about this project is that I already have a Soulslike editor set up in UE5 from my previous level studies. This lets me focus entirely on actual level design. If I need a new feature, I can quickly make a few minor tweaks, and just like that—new functionality is ready to go.


Iteration

Prototype 01

Prototype 02
Prototype 03
Prototype 01

Prototype 01
Prototype 02

Prototype 03
Prototype 01

Prototype 01

Prototype 02

Prototype 03
Prototype 01
Since I have all function all set up already , I can quickly conduct playtests and iterate my design. Typically, I start with a simple idea, such as, "I want a street here," then begin whiteboxing and test the initial design myself. Once I have a basic structure and an understanding of how the space feels, I sketch multiple versions of the level, then adjust the blockout directly within the engine. After refining the design, I conduct playtests with new players to see if their behaviors align with my original intentions. Based on their feedback, I repeat this iterative process until the design meets my goals.


Design Philosophy/Goals
Optional Area

Hidden/New Area
One of design goal was to add enough optional/ hidden areas around the main pass, when player died, they wouldn't have to keep grinding the same spot again and again, instead they may find some hidden area and reward creating a fresh experience. The level that I'm referencing from is undead burg from Dark souls 1 it has a lot of hidden areas and callbacks which is very rewarding. I wanted to create this kind of experience in my level.
Shortcuts
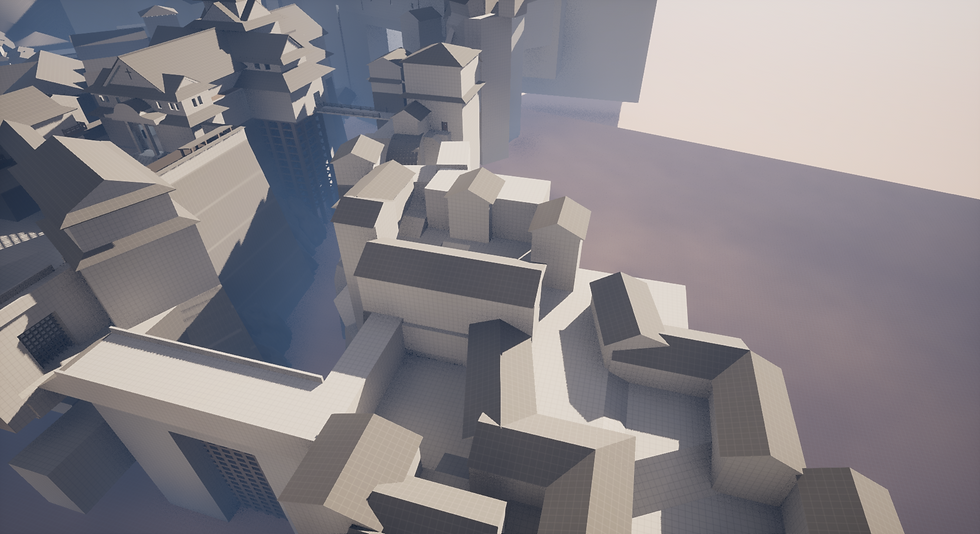
A key feature defining a "Soulslike level" is its highly interconnected layout, with multiple paths connecting different areas. To ensure my levels feel authentically "Soulslike," I began by drawing a mind map of the overall structure and gradually add more connections between areas. Essentially, the more interconnected the level becomes, the more it captures the distinctive feel of a Soulslike experience.

Reusable Asset
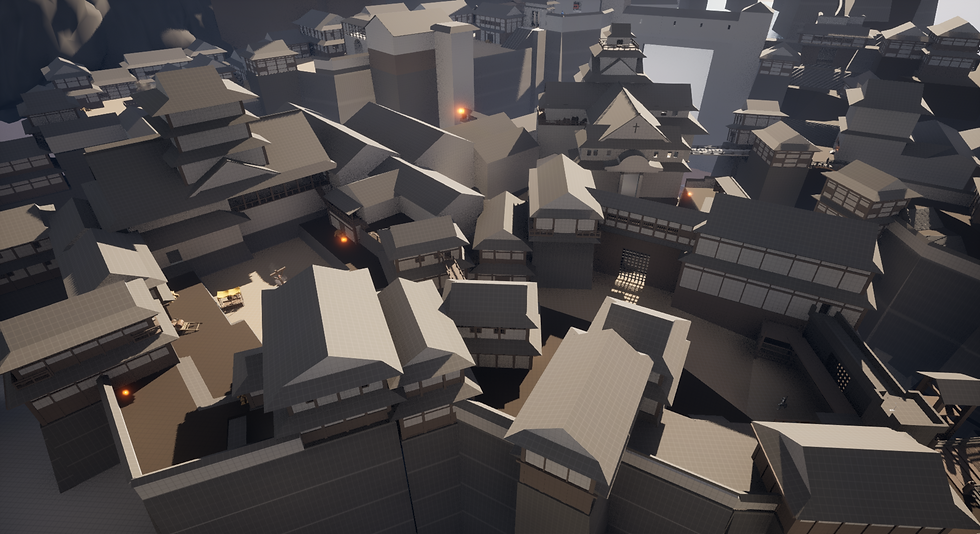
When playing Sekiro, I noticed heavy reuse of buildings, especially in Ashina Castle, which significantly reduced development costs. I chose Sekiro because —these house types are easily reusable. After finalizing the general layout, I modeled eight different house types to replace placeholder buildings, allowing environment artists to quickly swap them out later.

Level Walkthrough
Route


Right Side Of The River
(Down Section)
The right side of the river is sequence of 3 areas that leads to the church. Each area has main paths and short optional paths for the player to discover.
-
big bridge and optional boss
-
main road after second bonfire
-
broken road & entrance of the shipyard
Big Bridge and Optional Boss
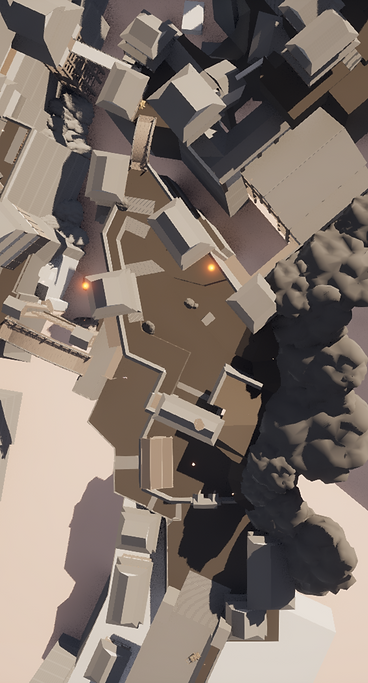
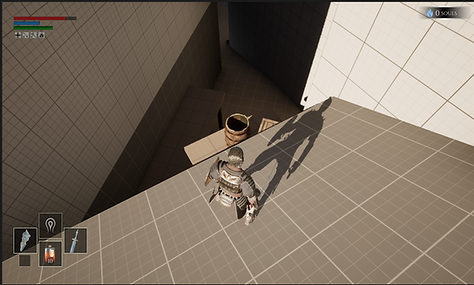
The player begins at the high platform of the Broken Bridge, where the initial sightline reveals all the key landmarks they will visit later in the game. The level is composed using layered vertical composition, divided into low, mid, and high tiers. The low level serves primarily as background dressing or visual set dressing, intentionally minimizing its importance to the player's perception. The mid level, which dominates the sightline, contains the core gameplay spaces where most exploration, traversal, and encounters occur. The high level functions as a visual goal or macro landmark, drawing the player's eye and subtly signaling their long-term objective — the final destination they will eventually reach.

View of the player first start the game
Introducing Fall Damage
The first bonfire is located at a high platform of the bridge. Below the bridge, tiered platform stairs act as a teaching space for fall damage: dropping from the bonfire straight to the bottom is lethal, while falling from the mid-level causes moderate damage. Environmental props enhance depth perception, helping players judge safe drop distances and understand verticality.

Death
Moderate damage
Reference for proportion

Diagram of route outside the Door
Optional Practice Boss
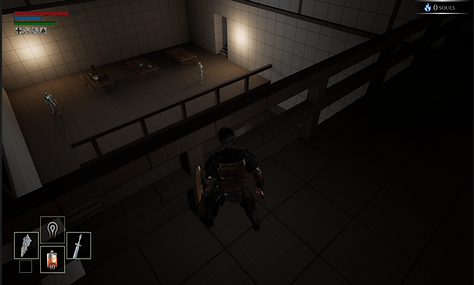
After crossing the large bridge, the player encounters the first boss — a samurai. Designed as a tutorial encounter, this optional boss teaches core combat mechanics like dodging, attacking, and thrusting. Though tough early on, the player can skip the fight via a nearby gate. Later, they can find a high platform behind the boss to perform a ground slam, cutting its health in half and making the fight easier.

Main Road after Second Bonfire
The main road features a broad, open layout with muddy terrain, using texture and spatial openness to create a distinct visual identity that stands out in the player's memory.

Diagram of route outside the Door
As the player enters the area, they first encounter a melee enemy positioned at the right corner, serving as an initial combat trigger. Advancing further, an archer placed in a high-visibility zone draws the player’s attention through line-of-sight engagement. If the player ignores the archer and pushes forward, they are confronted by another melee enemy, while still remaining within the archer’s attack range. This creates an intentional chokepoint that challenges the player’s situational awareness and encourages target prioritization.


If the player chooses to take the staircase ahead, they can bypass the main archer’s line of sight and enter an alternate route. This path leads to a close-quarters encounter with two enemies — a melee unit and an archer positioned at the corner, encouraging tight-space combat. Continuing through this route, the player enters a small reward room that loops behind the initial archer, allowing for a stealth approach and an easy backstab kill, reinforcing the value of exploration and route choice.
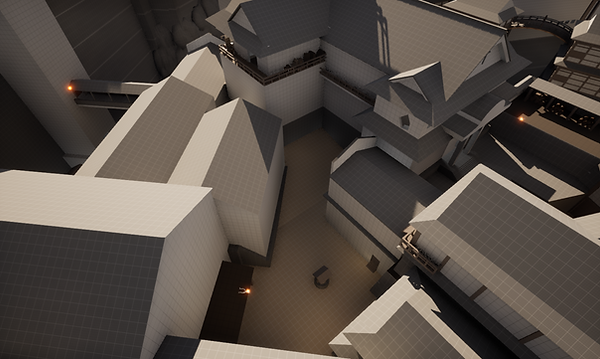
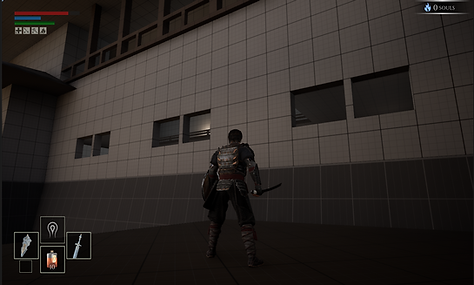
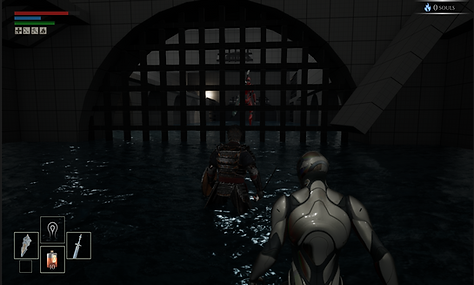
Broken Road & Entrance of the Shipyard

A huge gap blocks the player's path in a T-shaped space. I'm using visual cues to help guide players through this area in the intended order. After player discover the road has been destroyed, player will be driven by the right because of the red light

Central Church

The Church serves as the central hub and major visual landmark of the level, connected by two unlockable shortcuts. It functions as a recurring respawn point (bonfire), which player will respawn multiple times. Hidden areas and gated rewards are scattered throughout, some of which are progression-based, requiring specific actions like acquiring a key tied to the player's chosen path.

Floor 1

Floor 2

Players will hear the sound of a blacksmith as soon as they enter the church. After obtaining the key, players can unlock the upper area of the church and reach the blacksmith.

After resting at the second bonfire, the player is funneled left into an open combat space and encounters three enemies—an elite enemy (non-respawning) and two standard sword enemies. This marks the first large group encounter more than three, designed to teach spatial awareness, enemy prioritization, and crowd control. The area’s openness allows players to manage threats by isolating enemies. Failure results in respawning at the nearby Church bonfire, reinforcing the loop. This encounter serves as a skill check, preparing the player for the upcoming street section with higher enemy density and increased difficulty.


After defeating the enemy, the player reaches the church gate and discovers it's locked. Through the gate, they can see the previously explored street (if the boss was defeated), populated with multiple enemies—acting as a visual cue that this is the next objective. On both the left and right sides, pickups and light shining through the window serve as spatial and visual cues, indicating both areas are accessible that need exploring.
Players hear the sound of hammering—hinting at the blacksmith—as soon as they enter the church. The sound grows louder as they move upward, creating an ambient cue, though its source remains unclear. Later in the game, players acquire the church roof key in the slaughterhouse. This allows them to unlock the upper area of the church and finally reach the blacksmith— creating an “aha” moment that rewards the player for game progression.
Church Gate

Diagram of Route to The Lever
Players will come across a hole they previously noticed, and from the rooftop, they gain line of sight to the hidden area—reinforcing spatial memory and encouraging further exploration
Players will come across a hole they previously noticed, and from the rooftop, they gain line of sight to the hidden area—reinforcing spatial memory and encouraging further exploration
In the lever room, the player can see the next space above, with light and enemy silhouettes foreshadowing the upcoming area.
Hidden Areas
Left Areas
The first hidden area can be discovered when the player initially enters the church. It’s located on the left balcony—part of the main path the player will revisit frequently.


There are significantly more breakables on the right side, encouraging the player to investigate. Even if they miss the hidden path at first, this side have a door that must be opened from the other side—prompting the player to return and explore again even though it's a pass to another area.


If the player explores the left side first, they’ll notice a distant area across the balcony. Below is a room they previously checked but found locked. Light shining through a mysterious hole in the wall subtly reminds them that there might be another way in.
Based on prior gameplay, they’ll likely break nearby objects for pickups—and as expected, there is one. This reinforces the behavior, so when they check the other side of the balcony, they’re less likely to miss the hidden path, having just been rewarded for breaking breakables.


From the pickup location, the player has line of sight to the locked door and the path leading to the next area.
After jumping onto the roof, breakables and extended platforms serve as spatial cues, reinforcing this as the intended path.


After landing on the ground, a visible pickup on the roof serves as a visual cue, signaling a reachable path. Even if missed initially, its reappearance on the second house reinforces the prompt of the hidden path.
Hidden path to the lock doors
Path back to the church gate
Top Section

Boss shortcut
Although the player can't open the first door (requiring access from the other side), they can break through the second door on the right. This leads to the discovery of a potential shortcut to the boss area. Inside the room, a hidden chest provides a reward, but the shortcut remains locked—serving as a delayed payoff and encouraging future backtracking.
Lock Doors to the blacksmith
The door on the left functions as a locked shortcut to the blacksmith, requiring a key accessed on the other side later in the level. As the player progresses, they acquire the key, enabling them to unlock the door and access the church's upper level—reinforcing looped level design and rewarding exploration.


After climbing onto the roof, the player will meet a NPC hints that the slaughter house key(critical path to the boss) may be located in the shipyard and informs the player that the only accessible route is through the sewer.

Reaching the blacksmith indicates the player has progressed to the slaughterhouse. Using the key that player get in slaughterhouse to unlocks the ability to upgrade weapons, providing a mechanical progression tied to exploration and progression.
Street

The street is heavily inspired by Central Yharnam from Bloodborne. The main design goal is to ensure players fully engage with and learn the combat system. To reinforce this, players can’t upgrade their weapon (by accessing the blacksmith) until they reach the slaughterhouse. The street is densely populated with both ranged and melee enemies, requiring players to prioritize targets strategically and manage crowd control to avoid being overwhelmed.
There are two ways on the main street on left leads back to the boss that player encounter at the gate. The right is the main path that guiding player to the other side of the cliff.

Left Side of the Street

Diagram of the Route on the Right Side


If the player chooses the right side of the street, they’ll immediately spot three patrolling enemies in a narrow chokepoint, which discourage player moving there first. Then they saw a door positioned above, highlighted with clear lighting cues, and found that the door need open from another side, but next to it, there's two melee enemies guarding a pickup for player to collect.

After discovering the alternate path is inaccessible, the player returns to the main street and encounters three patrolling melee enemies, along with a fourth enemy facing a campfire. The encounter space is deliberately narrow, creating a confined combat zone. The player need carefully defeat the patrolling enemies without drawing the attention of the fourth.
If the player tries to run past the enemies, they will encounter another crowd and a ranged enemy, getting sandwiched between foes from the front and back—teaching the player: "Don’t try to run past your problems."

Once the player defeats the four enemies, they arrive at the end of the street where a larger encounter space unfolds. In the center, angry villagers set up a samurai (representing the nobles) on fire.
To the left, broken props and scattered pickups serve as visual cues and affordances, subtly guiding the player toward the main path. On the right, is an two-layered space. The first layer is accessible and offers a line of sight through the windows of the slaughterhouse, while the second layer remains unreachable for now, foreshadowing a future shortcut.

Screen shots of the pass to the sewer( main path)
Screen shots of the player seeing through the window of the slaughter house
Slaughter House

Upon entering the slaughterhouse, players encounter strong environmental storytelling: noble samurai corpses hang from the ceiling, while hostile villagers below continue to mutilate the bodies.
On the second floor, the player discovers the bridge gate is locked and requires a key. By climbing to the top floor, they find a chest containing the Church Ceiling Key, which grants access to the blacksmith.


Screenshots of the locked door leading to the bridge
Video of the pass to reach the chest

Diagram of slaughter house shortcut
Upon entering the slaughterhouse, players encounter strong environmental storytelling: noble samurai corpses hang from the ceiling, while hostile villagers below continue to mutilate the bodies.
On the second floor, the player discovers the bridge gate is locked and requires a key. By climbing to the top floor, they find a chest containing the Church Ceiling Key, which grants access to the blacksmith.
Right Side of the Street

The left side of the street leads back to the tutorial boss the player first encountered. It serves as an optional path for exploration, offering a lower-risk alternative compared to the more challenging main path on the right.
The path is blocked by a metal gate, which again can only be opened by pulling a lever. The entrance is clearly visible on the lower right side, but a bulky melee enemy stands in the way, guarding the passage.
Above, two ranged enemies on an elevated platform continuously harass the player if they attempt to engage the ground enemy first. This setup encourages the player to prioritize clearing the ranged threats on the high ground before confronting the bulky melee enemy.


After entering the tunnel, the player reaches a building located directly beneath the church lever. Along the path, several melee enemies create light combat pressure, while scattered pickups, such as those placed on structural supports.

1st Floor

2nd Floor
(Underneath the church lever)

After raising the gate, the player can access the rear platform above the initial boss arena, where they can perform a plunging attack from above. This path also allows the player to progress all the way to the second bonfire near the front gate.

Screenshots of the spot where the player performs a slam attack on the boss.

Teasing bonfire on the cliff
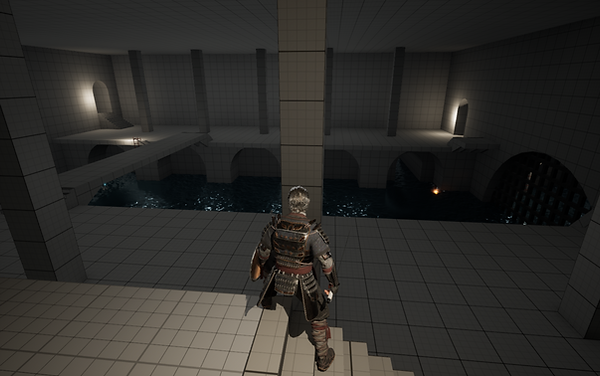
Sewer

Like most Soulslike sewer levels, this area features tight tunnels and frequent ambushes, creating constant tension. This contrasts with the more open ground-level spaces, where players have more freedom to maneuver and use the environment to their advantage in combat.
Another design goal of this level is to create strong spatial cohesion by connecting different areas together. The tunnel is designed to feel like a believable village sewer system, situated directly beneath the church, reinforcing a grounded and immersive world layout.
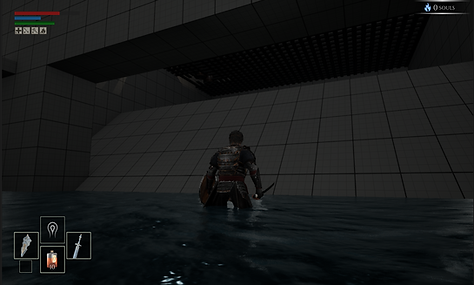
Entering the Sewer

On the right side of the plaza, construction tools, props, and pickups are used as environmental cues to draw the player toward the area. A small, dimly lit hole is intentionally hidden in the shadows to create a sense of organic discovery. Melee and ranged enemies are positioned to pressure the player into retreating in that direction, reinforcing the illusion that they found the path on their own.
Jumping down the sewer
Jumping down the sewer
Teasing bonfire on the cliff
Teasing bonfire on the cliff
The Cliff

Boat Yard

River Bed

Left Side of The River
(Down Section)
